Making a 1/48 Scale 1939 Ford Pick Up Truck
- Michael E Rieth

- Feb 17, 2020
- 3 min read
Updated: Apr 29, 2020
Continuing on to the finish. Here is the link to the scratch built pick up truck bed- https://www.riethcreations.com/post/2019/04/26/148th-scale-1939-ford-pick-up-truck-bed
I started with a 1/48 scale Wespe Models Ford 917 Steel Cab Shelter resin kit. The only parts used were the cab and chassis, which needed to be shortened.

I had to make longer and wider running boards. The materials are .156″ evergreen angle, .010″ diameter straight brass wire, and .020″ sheet styrene.

I scribed 5 lines for the placement of the thin brass wire and CA glued the wire in place.

The shape of the Wespe Models cab of the Ford G917T truck just didn’t look right to me, too wedge shaped and wide at the rear, especially after it was put next to my scratch built pick up truck bed and running boards.

My AMS (Advanced Modeler Syndrome) kicked in and I had to do something about it. I was dreading making the modification, hoping it would not take too long and be too difficult. My drawing showed a cab width dimension of 60″ (1.524m) or 1.25″ (3.175cm) in 1/48th scale. The Wespe cab was 1.45″ (3.683cm), .2″ (5.08mm) too wide. I had to remove .1″ (2.54mm) from both sides of the cab.

With my calipers, I scribed lines .1″ from the engraved lines on the back of the cab. I cut through the engraved lines and again at the .1″ marks. I marked and cut small triangles from the roof.

After sanding the mating edges straight, I CA glued the sides to the roof.

I think it better represents the shape of a Ford 1939 pick up truck now and it took about an hour.
The kit’s door and hood trim is flat and should be 3 stamped half rounds, going to 2 on the hood going to 1 near the grille. I removed the kit detail, sanded smooth and used super thin CA to glue the .020″ styrene rod to the door and hood. The capillary action of the CA wants to pull the rod towards the applicator, so I had to be careful to keep a straight line.


I removed the roof to back side seam on the kit and added the curved trim to the back.

With a little paint, it will look the part. Now on to fixing the shape of the back window.

My custom paint mix is Semi-gloss white, Imperial Japanese Navy underside grey and a few drops of chrome yellow. It is slightly more green than in the photo, which matches the pick up truck in 1941.

I finished making and putting in the clear windows from .030″ clear sheet in the cab. I assembled the major components. The scratch-built running boards look good with a little dry brushing and the scratch-built bed fits nicely also. I forgot to take a photo of the dashboard, which has some dials I scavenged from an old Monogram Promodeler instrument decal sheet.
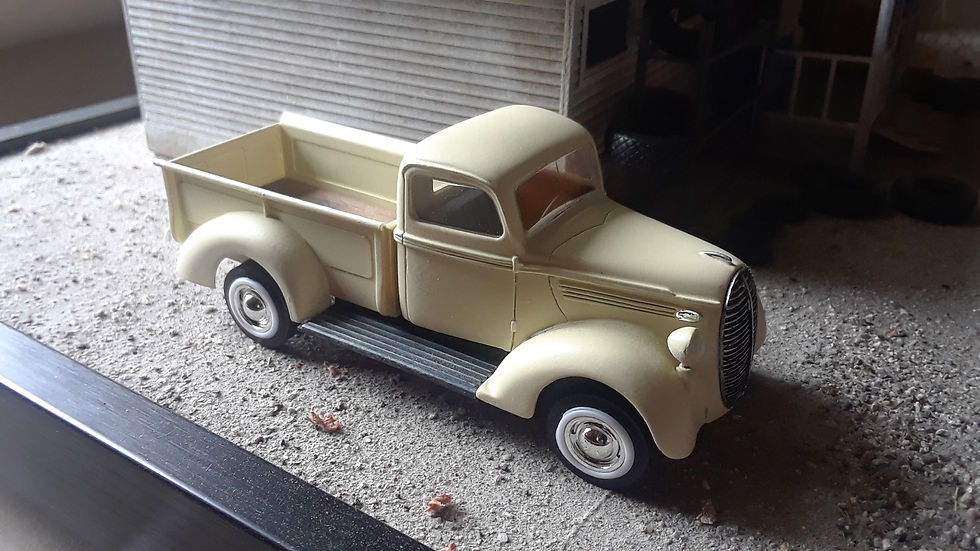
The kit came with big truck tires and rims, I found a cheap 1/43 scale diecast truck online and took the wheels. The chrome hub caps needs to be dulled down. I tried to pry the headlights off, but the chrome bevel broke. The clear lens are good. I’m making new bevels from Evergreen tubing.

The 1939 Ford pick up truck looks great in the diorama. I need to add some door handles, bumpers and windshield wiper.
Thanks for following along and Happy Modeling.


Comments